Oven Cleaning in Homes and Businesses: Practical Tips, Deep Cleaning Steps, and Long-Lasting Results
Why Oven Cleaning Matters More Than You Think

Oven cleaning is one of those household tasks that many people put off until the grease, smoke, and burnt-on residue become impossible to ignore. Yet keeping your oven clean is about far more than appearance. A well-maintained oven heats more evenly, cooks food more consistently, and can even help reduce energy waste. Whether you rely on your appliance every day or only for weekend baking, regular oven cleaning plays a major role in kitchen hygiene and performance.
From splattered sauces to baked-on crumbs, ovens collect a surprising amount of grime over time. When that buildup is left untreated, it can produce unpleasant odors, affect flavor, and create smoke during cooking. In some cases, heavy residue can even become a fire hazard. That is why oven cleaning should be treated as a routine part of home care rather than an occasional chore. For busy households, professional oven cleaning can also save time and deliver a noticeably better finish.
There is also a comfort factor. A sparkling oven contributes to a cleaner-looking kitchen overall and makes everyday cooking feel more pleasant. If you have ever opened your oven door to see stubborn grease stains or carbonized food stuck to the glass, you already know how quickly a neglected oven can undermine the look of the entire space. With the right approach, oven cleaning can be efficient, manageable, and highly rewarding.
Signs Your Oven Needs Cleaning

It is easy to ignore early signs of buildup, but your appliance usually gives clear hints when it is time for oven cleaning. One of the most common clues is visible grease on the interior walls, racks, or door glass. If the oven surface looks dull, sticky, or streaked with dark patches, residue has likely accumulated beyond a simple wipe-down.
Another warning sign is smoke. If you notice smoke coming from the oven while cooking, especially when the appliance is not set to an unusually high temperature, grease and food debris may be burning inside. This can also create an unpleasant smell that clings to your kitchen. In many cases, the odor persists even after the oven has cooled, which is a strong indicator that deep oven cleaning is overdue.
You may also see uneven cooking results. When the heating elements or interior surfaces are coated with grime, heat distribution can be affected. Food may bake unevenly, take longer to cook, or develop spots where it is overdone on the outside and undercooked on the inside. If your oven is behaving inconsistently, a thorough cleaning could restore much of its performance.
Common warning signs
- Burning smells during preheating or cooking
- Visible grease or carbon deposits
- Stained oven glass
- Smoke from food drips or old residue
- Food cooking unevenly
How Often Should Oven Cleaning Be Done?
How often you should schedule oven cleaning depends on how frequently you cook and the type of meals you prepare. A household that uses the oven several times a week will typically need more frequent attention than one that only bakes occasionally. In general, a light clean every few weeks and a deeper clean every few months is a sensible starting point for many homes.
If you cook with oils, roast meats, bake cheesy dishes, or prepare meals that splatter, you may need to clean the oven more often. High-temperature cooking can also cause spills to bake onto surfaces quickly, making them harder to remove later. Regular maintenance is the easiest way to prevent buildup from turning into a major cleaning job.
For commercial kitchens or busy rental properties, oven cleaning may need to happen on a tighter schedule due to heavier use. The key is consistency. Routine maintenance reduces the need for aggressive scrubbing, helps preserve the appliance, and supports safer operation. If your goal is to keep the oven in top condition, staying ahead of grime is far better than waiting until the interior is heavily coated.
A practical cleaning schedule
- Wipe spills after each use once the oven is cool.
- Perform a light clean weekly or biweekly.
- Carry out a deeper oven cleaning every 2 to 3 months.
- Address stains and splatters immediately after cooking messy dishes.
DIY Oven Cleaning: Methods That Work

Many people prefer DIY oven cleaning because it can be simple, affordable, and effective when done regularly. The best method depends on the level of buildup and the materials used in your appliance. Before starting, always turn the oven off, let it cool completely, and remove racks and accessories. Safety matters, especially when working with cleaning products or scrubbing near delicate surfaces.
A popular approach uses baking soda and water. This paste helps loosen greasy deposits without relying on harsh chemicals. Spread the mixture inside the oven, avoid heating elements, and leave it to sit for several hours or overnight. Once the paste has had time to work, wipe it away with a damp cloth. Stubborn spots may need a non-abrasive scraper or repeated applications.
Vinegar is often used as a follow-up rinse because it can help remove residue and leave surfaces looking brighter. Some homeowners also use mild dish soap for lighter grease deposits, especially on racks and removable parts. The main advantage of DIY oven cleaning is control: you can work gradually, treat problem areas carefully, and choose products that suit your preferences. Still, if grime is extensive, a professional solution may be more efficient and more thorough.
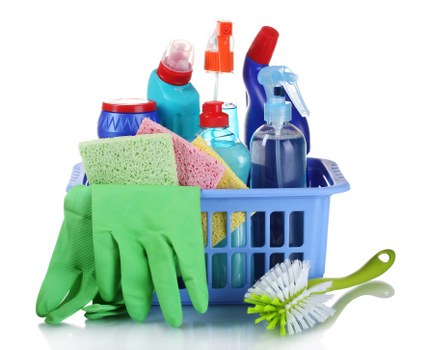
Simple DIY tools you may need
- Baking soda
- White vinegar
- Warm water
- Soft cloths or microfiber towels
- Non-scratch sponge
- Plastic or silicone scraper
Professional Oven Cleaning: When It Makes Sense

Sometimes DIY efforts are not enough, especially when the oven has years of buildup or the residue has hardened into a thick, burnt-on layer. In these situations, professional oven cleaning can be a smart choice. Trained cleaners usually have specialized tools, commercial-grade solutions, and the experience needed to restore the appliance more efficiently than a standard home method.
Professional cleaning is especially helpful if you are preparing a property for sale or rental, managing a busy household, or simply want a deeper result without spending your entire day scrubbing. A service can often address the racks, trays, glass, doors, corners, seals, and hard-to-reach areas that are commonly missed during routine cleaning. This is one reason many homeowners search for oven cleaning services when the appliance has become too dirty to manage alone.
There is also a convenience advantage. Instead of gathering supplies, testing methods, and spending hours on the job, you can rely on a scheduled service and enjoy a cleaner oven with less effort. If you value both time and results, professional oven cleaning can be an excellent investment. Book your service now if your oven needs more than a quick surface wipe.
When professional cleaning is worth considering
- Heavy carbon buildup or burnt-on grease
- Persistent smoke or odors
- Time constraints
- Rental inspections or property turnover
- Desire for a deep, detailed finish
Step-by-Step Oven Cleaning Process
A structured process makes oven cleaning easier and more effective. Whether you are doing it yourself or simply want to understand what a thorough service includes, knowing the usual steps can help you achieve better results. Start by switching off the appliance and ensuring it is completely cool. Remove loose crumbs from the floor of the oven and take out racks, trays, and any detachable accessories.
Next, apply your chosen cleaner. For DIY methods, a baking soda paste is often spread over the interior surfaces, while commercial products may be sprayed or wiped on according to the label instructions. Allow enough dwell time for the product to break down grease and grime. Patience is important here; rushing the process usually means more scrubbing later.
After the cleaner has done its work, wipe the surfaces thoroughly. Use a damp cloth to lift away loosened residue, repeating until the cloth no longer picks up dirt. Clean the racks separately, then dry everything completely before reassembling. For a polished result, finish by wiping the door glass, control panel, and outer surfaces. A clean exterior can make the whole appliance look newer instantly.
Detailed cleaning sequence
- Turn off and cool the oven.
- Remove racks and accessories.
- Clear loose crumbs and debris.
- Apply cleaner to interior surfaces.
- Wait for the product to loosen grime.
- Wipe, rinse, and repeat as needed.
- Clean racks and glass separately.
- Dry and reassemble.
How to Clean Oven Racks and Glass Doors
Oven racks often collect thick grease and blackened residue, so they usually need separate attention. Soaking them in warm water with dish soap can make a noticeable difference. For more stubborn deposits, a paste of baking soda and water can be applied directly to the metal. After soaking or treating the racks, scrub them gently with a non-scratch pad and rinse thoroughly.
Cleaning the oven glass is equally important because it affects both appearance and visibility while cooking. Start with a soft cloth and a mild cleaner or baking soda paste. Avoid abrasive pads that could scratch the surface. If the inside of the glass door has trapped residue, you may need to clean between the panels only if your oven model allows safe access. Always check the manufacturer’s instructions before dismantling anything.
For best results, make oven glass cleaning part of your regular routine. When stains are addressed early, they are much easier to remove. This small habit can make the oven look significantly better while also helping you monitor food as it cooks. Clear glass, clean racks, and a fresh interior all contribute to a more pleasant cooking experience.
Useful rack and glass tips
- Soak racks before scrubbing
- Use non-abrasive tools only
- Check the appliance manual before removing panels
- Dry all parts completely before reinstalling
Safety Tips for Oven Cleaning
Safety should always come first during oven cleaning. Even routine cleaning can become risky if products are used incorrectly or if the appliance is still warm. Before you begin, ensure the oven is switched off and disconnected if necessary. Good ventilation is also important, particularly when using stronger cleaning products. Open windows and doors where possible to keep fresh air moving through the kitchen.
If you are using commercial products, read the instructions carefully and follow all warnings. Some cleaners should never be used on specific surfaces or near heating components. Avoid mixing chemicals, since this can create dangerous fumes. When in doubt, stick to one method and let it do its work rather than combining products in an attempt to speed up the process.
Wear gloves if your skin is sensitive, and keep cleaning materials away from children and pets. Take care around seals, fans, and controls, which may be more delicate than the rest of the oven. A safe cleaning routine protects both the appliance and the person doing the work. Safe oven cleaning is always the best oven cleaning.
Safety reminders
- Let the oven cool completely first
- Ventilate the area well
- Do not mix cleaning chemicals
- Use non-scratch tools
- Follow manufacturer instructions
Eco-Friendly Oven Cleaning Options
For readers who want a greener approach, eco-friendly oven cleaning can be both practical and effective. Baking soda, vinegar, lemon juice, and warm water are common choices because they are widely available and generally less harsh than many commercial formulas. These products work best when the grease is not extremely heavy or when used regularly to prevent buildup.
One advantage of eco-friendly cleaning is that it supports a fresher kitchen environment. Strong chemical odors are reduced, and the process feels more manageable for people who prefer simpler ingredients. You may need more time and a little more elbow grease, but the tradeoff is often worth it. For many households, natural oven cleaning aligns with broader goals such as reducing waste and minimizing harsh cleaning agents around food-preparation areas.
That said, eco-friendly does not mean ineffective. When used consistently, natural products can handle routine dirt and light grease very well. They are especially useful for maintenance between deeper cleans. If your oven is only mildly dirty, a natural method may be all you need to keep it in excellent shape.
Natural options worth trying
- Baking soda paste for lifting grime
- Vinegar spray for wiping residue
- Lemon water for freshening surfaces
- Warm soapy water for detachable parts
How Clean Ovens Improve Cooking Results
There is a direct link between oven cleaning and cooking performance. A dirty appliance cannot operate at its best because residue absorbs heat, creates smoke, and interferes with airflow. Clean surfaces allow heat to circulate more predictably, which helps food cook more evenly. This can make a real difference when baking cakes, roasting vegetables, or preparing dishes that depend on stable temperatures.
Cleaner ovens also reduce the risk of unwanted flavors transferring to food. Burnt grease and old spills can release odors that affect the taste of delicate meals. This is especially noticeable with baked goods and slow-roasted dishes. If you have ever pulled a meal from the oven and noticed a faint smoky aroma, grime is often the culprit.
In addition, regular oven cleaning supports appliance longevity. Less buildup means less strain on components and fewer issues caused by excessive residue. Over time, this can help avoid unnecessary repairs and extend the useful life of your oven. In other words, a little cleaning now can save money later.
Common Mistakes to Avoid During Oven Cleaning
Even with good intentions, it is possible to make oven cleaning harder than it needs to be. One common mistake is using overly abrasive tools that scratch enamel or damage glass. Another is applying too much product and assuming it will work instantly. In reality, most cleaners need time to soften grime before scrubbing begins.
People also sometimes forget to clean removable parts separately. Racks, trays, and the door often hold a large share of the dirt, so leaving them out can make the entire job feel incomplete. Likewise, failing to rinse away cleaner residue can leave streaks, smells, or even a sticky film that attracts more dirt later. A careful final wipe is just as important as the main scrub.
Finally, skipping regular maintenance is one of the biggest mistakes. Waiting too long between cleans allows buildup to harden and become more difficult to remove. The smartest approach is consistency. Small, frequent tasks keep oven cleaning easier, faster, and far less stressful.
Mistakes to avoid
- Using metal or abrasive pads on delicate surfaces
- Cleaning a warm oven
- Leaving cleaner residue behind
- Ignoring racks and glass
- Waiting too long between cleans
Keeping Your Oven Cleaner for Longer
Once the oven is spotless, the next goal is keeping it that way. One of the easiest habits is to wipe spills as soon as the oven has cooled. Fresh spills are much easier to remove than baked-on stains. You can also place a tray under dishes that are likely to splatter, helping catch drips before they hit the oven floor.
Another helpful habit is to check the oven after messy meals. If you have roasted a marinated chicken or baked a bubbling casserole, a quick inspection can prevent long-term buildup. Regular light maintenance takes only a few minutes and can dramatically reduce the need for deep oven cleaning later. For busy families, these small habits make a big difference over time.
If you share cooking duties at home, it helps to make oven care part of the kitchen routine so everyone knows what to expect. Cleanliness becomes easier when it is treated as a normal step rather than a special project. And if your oven ever gets away from you, there is no shame in calling in professional help. Contact us today or book your service now if you want a cleaner, fresher oven without the stress.
Final Thoughts on Oven Cleaning
Oven cleaning is one of the most valuable maintenance tasks in any kitchen. It improves hygiene, supports better cooking results, reduces odors, and helps your appliance last longer. Whether you prefer DIY methods, eco-friendly products, or professional support, the key is to stay consistent and address grime before it becomes overwhelming.
A clean oven does not just look better; it performs better too. When heat can circulate freely and residue is removed regularly, cooking becomes more reliable and enjoyable. For homeowners, renters, and busy families alike, oven cleaning is a simple habit with lasting rewards. If your oven needs attention now, take the next step and make it a priority today.
Book your service now and enjoy the difference that a properly cleaned oven can make in your kitchen.